Viili Guide
 Welcome to the viili family! If you haven't already, you can purchase Viili from our store.You are now part of a world-wide community that has sustained this delicious health-promoting yogurt for hundreds of years.
Most fermentations, including viili, do not do particularly well with some types of metal utensils or metal containers which can damage them.
It is recommended to stick with glass, wood and plastic when handling and fermenting. Stainless steel is considered safe for short term contact such as straining or stirring.
View the printable PDF version of this guide.

PREPARATION
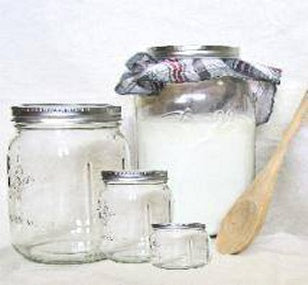
Utensils needed:
• The smaller, the better - clean glass baby food jars work well.
• Wood or plastic spoon AND a cloth for a lid.
• Plastic/nylon or stainless steel strainer
• Another similar jar (while the other is stored in the 1st jar)
• Having multiple jars and various size jars on hand for fermenting is recommended.
*When buying organic - check the cartons carefully, many are ultra-pasteurized.
**Hold off on experimenting with other milks such as raw, 'cream on top', canned, almond, soy or coconut until the viili has fully activated for a few weeks and you have plenty of back-up to play with.
STEPS
1. It's best to start to start activation on the morning of a day you can check up on your viili every 6-8 hours. If you can only check every 12 hours, that is ok, too. You will need to check it the next day, too, so a Saturday is usually a great time to start. 
When you are ready to start making viili, place half (approx 1 teaspoon) of the dried viili into a small, clean jar.
Feed the dried viili 1\4 cup or 4 tablespoons of milk (see section above on what milk to use). Give it a good stir. It will spend the first few hours primarily rehydrating and 'waking up'. The activity will depend largely on the milk used and the temperature where the jar is kept (out of direct sun, or in a cupboard, with a temperature of about 68--80F°/20-26C° is best.) Anything colder and it will struggle to activate. Anything hotter, and it will have less consistent results and may curdle.
NOTE: Do not stir, shake or disturb the starter (viili) while it ferments. The only time to disturb it is when you're digging in to eat it. :)
2. Cover the top of the jar with a breathable cloth or you can also use a loose lid if desired. Viili can ferment with or without oxygen, so either way will work.
3. Time to let it do it's thing! Find a place for your viili out of direct sunlight. A cupboard is just fine. The top of the fridge works great in homes during the winter.
 4. After 8-12 hours check to see if the viili has 'set', ie, when you gently giggle the jar or gently tilt it, it does not move. If it's a little jellyish/runny in the center, let it sit a couple more hours and check again. Your viili starter may or may not be set by the end of the first day. When it is set, store it in the fridge (with a normal jar lid, not cloth - this keeps it fresher and avoids it absorbing other 'fridge' odors). If it is still runny after 24 hours, put it in the fridge anyway. It is fairly common for it to take a couple days to set (even if you feel like you are just feeding and chilling milk and nothings happening)- just keep following the steps.
5. After being in the fridge for atleast 8 hours take it out, and use 2 teaspoons of starter for 1 cup of milk. If the starter is still runny, use 2 teaspoons of starter for 1/2 cup of milk instead.
6. Cover again with the cloth lid. Let it sit out to ferment, the same as the day before - checking it every 6-8 hours, until you see it set (not exceeding 36 hours). Once it's set, store it in the fridge again. Viili always does best when given this 8-12 chill period, before feeding it again.
 7. If your viili did not set the first day, it may set by the end of this day, or the morning of the next (leave it out until it sets, but no longer than 36 hours). If it does not set, repeat steps 5-7 again. Try to find a warmer location, if it's on the cool side. If you wish, you can try using the other half of your original dried packet to begin again, if you feel something went wrong or the temperatures weren't ideal on the first try. Warm temperatures really help when it comes to working with viili - even placing it on top of a fridge or running dishwasher can help a lot.
8. After it has set and been stored in the fridge 8-12 hours, you may take your now 'activated starter' (viili) to make your first batch of viili to eat! The standard ratio is 2 teaspoons of viili starter to 1 cup of milk. It can take up to 24 hours when it cold or 8-12 hours when its warm. Typically it will take around 12-18 hours with most room temperatures. Be sure to store some for the next batch before eating it! - please read the 2 notes below.
Important NOTE: The important thing to remember with viili is that you need to STORE (save) the amount of viili you need for making the next batch, before digging in to eat. For example, if you want to eat a cup, and make only a cup, you'll have none left to make the next batch. So to clarify further, if you want to continuously make 1 cup for each new day (and eat that full cup), you will need to make roughly 1 1/2 cups each time. The 1/2 cup will serve as the starter for the next batch and so on and so forth.
 One more Important NOTE: When storing your viili you have set aside for making the next batch, be sure to do it before you begin to eat it (right after it has chilled). Take out the amount you need for the next batch and put it in a clean, secure jar back in the fridge until you're ready to use it to make new viili. It will store up to approx. 7 days. After that, the quality and strength of your starter will begin to decline. If you plan on making one big batch a week, then simply use 2 jars, making one as the starter for the next week, and the other jar as the one you will eat for this week. This can seem confusing at first, but you will quickly get the hang of the process as you go.
And lastly, a NOTE on RAW MILK: If you are wanting to use raw milk to make viili, you will still need to always maintain your main starter with pasteurized milk. Viili is not as strong as kefir, and the natural bacteria present in raw milk with eventually out-compete viili. Always maintain your main 'mother' starter with pasteurized milk (raw heated to 180°F or store-bought). From this starter you take the amount you need (ie, a couple spoonfuls) to inoculate your raw milk. Raw milk has a tendency of producing thinner viili - sometimes heating it to 98°F for a few minutes will help with this (while still maintaining all the important raw nutrients).
That's it! You can now enjoy your home-made viili! It should be thick, and ropey when you pull your spoon up - this ropey character should appear within the first few batches or few weeks of using your viili, depending on temperature and milk used (warm temps and whole pasteurized milk being ideal). You may even find it pulls back into the dish - try not to get into a fighting match eating it! ;) Whole milk always lends the best texture to experience this fully. The texture and consistency is incredible (and fun), It is by far one of the most unique and loved of cultures. It really is a fool-proof process, so don't worry too much, people have been doing this for many hundreds of years! Have fun, experiment and enjoy!
Tips
It's always helpful to label your jar and date it. Permanent marker does wash off easily with a swipe of the rough side of a sponge! Tip: if you want to use masking tape, apply it before filling with milk, or it won't stick.
If you have other ferments (particularly other meso yogurt cultures or milk kefir), it's ok to have them sitting in the same room, but do not mix culture utensils. They can sometimes 'hybridize' between the two cultures if mixed.
If you notice a blanket of white fuzz on the surface, light tan splotches, or a milky/oily water sitting on top, those are all normal (and safe) for viili, sometimes it happens, sometimes not. If it's colorful or questionable mold in any way, toss it.
Sometimes viili can separate into whey (clear) and curds (solids) when left out too long, or in really hot temperatures. This is ok too, but it might be best to make a new batch and catch it before that point, and save part of that new batch as your starter for the next. Which leads us to our final tip:
Always save your starter for the next batch from your very best batch possible. AND always keep a 'smidgen' of every starter batch leftover in your fridge just in case, until your new batch is completely done, chilled etc and you safely have your new viili starter set aside for your next batch. You never know when you may need an extra backup handy! You'll be happy you had a little emergency back up in any of these cases (which are easy to happen!): dropped jars, let them sit out too long or completely forgot about them, pet licked it, someone tossed them, etc!. You can also store backup by freezing a bit in an ice cube tray, then popping out the cubes into labeled bags for the future (and keep in the freezer until then! (lasts about 3 months, activates the same as the dried instructions on this guide)).
Flavoring should ONLY be done AFTER fermenting and only after you have saved a bit of starter for your next batch. You can then add flavoring a little bit before eating, or right when eating your viili! :) Experiment to your hearts desire - extracts like vanilla, almond, lemon or hazelnut are always delicious. Fresh fruit is wonderful... spices such as cinnamon or cardamom, etc paired with maple syrup. A little drizzle of raw honey and sliced almonds is great. Or if you're in the savory mood, try salt, lemon and garlic as a dipping sauce. Though we should add, viili is not the best for that purpose unless its sufficiently thinned with liquid in a blender. It's ropey nature is such that it will pull right back into the dish instead of sticking to your food (or spoon!). A good prank, perhaps. ;) I must add that despite this, it really is a delicious dip, even plain, especially for apple slices (which for some reason tastes a bit like caramel when paired with apples)!
Before Eating Viili...
Viili contains probiotics - good bacteria and yeast as well as being slightly acidic (from the healthful lactic acid). For a few people's bodies it can be a little bit of an adjustment (probiotics can have this effect). For most people it is not any different than eating a new brand of yogurt. Everybody reacts to new foods differently though, so we always recommend starting out slow to see how your body takes to it. Sometimes the morning is best for introducing new foods, with a meal (not on an empty stomach). Start with a tablespoon and go from there.
The majority of people do not have any adverse reaction, but if you do, usually it's just a matter of starting out slow and slowing increasing over time. If you experience anything alarming or have continual negative symptoms, use your best judgement and stop eating it for awhile. Try it again down the road, or find another ferment that may be better suited for you (kombucha, sauerkraut, the list is endless).
If you need any further help beyond this guide, feel free to email us at any time at yemoos@yahoo.com

Extra Viili and Storage
After your first few batches:
As you continue to make viili, you may find you have more and more to work with. At that point, you can either add more milk if you want more viili eat them or store the viili (it's always a good idea to have some back-up starter on hand!).
How to store your extra viili starter:
Freezing - best for medium to long term, easy storage
To freeze, simply place a few spoonfuls in each cube of an ice cube tray, and let freeze on a flat surface. Then pop them out into a freezer bag within a day or two and store for about 3 months. The frozen viili will maintain fairly good strength for 3 months. Sometimes a few months longer is still viable, but it's best to take note and make a new back at that point if you haven't already. It may help to prolong their vitality and storage time by burying the cubes in milk powder (in a jar or bag). This helps keep them from exposure to air and forming damaging ice crystals. Or at least, once popping the ice cubes out, to store them in a vacuum-sealed bag vs a regular one, if you have that option.
Dehydrating - best for long term, convenient and/or transportable storage
Viili can be spread on a silicone baking mat, freezer paper, wax or parchment paper to dry, which will take a few days. Try to locate it in a clean room where it won't be disturbed or contaminated. If you have a dehydrator with a low setting (such as below 85°F) then that will work too. When the viili is dry, you can store it at room temperature, in the freezer, or in the refrigerator. A bag, jar or envelope are all good options for storage. Dehydrated viili should be successfully reconstituted within about 3-6 months (try to make a new backup every 3 months).
Refrigerating - best for very temporary storage
If you need to store viili temporarily, your starter will be fine for 7 days in the fridge. It may be fine for 14 days, but 7 is the recommended limit. If you can, check with a thermometer to ensure that your fridge is as cold as possible without being freezing (about 35°F). This is the best method of storage if you're planning to take a break of about a 2 weeks or less. It may take a batch or two to stabilize. If you're taking a longer break, freezing or dehydrating is a must.
Recipes

Viili has a mild and delicate flavor that is agreeable to most palates plain, just as it is. However, it is very simple to add some flavoring by mixing in some fruit, extract (like vanilla or hazelnut), cocoa powder, etc!
For example, Vanilla or any other extract or spice: 1 tsp per 1 cup is a good general rule.
For recipe ideas, please visit our milk kefir recipe page, as most of the recipes work perfectly and identically well for Viili, too!